Custom Search
Showing posts with label FRIST AID. Show all posts

Frostbite

Frostbite is the damage to tissues from freezing ;The blood vessels contract and cause loss of oxygen to the affected body parts.And results formation of ice crystals within cells, rupturing the cells and leading to cell death.
It most commonly affects areas that are further away from the body core and have less blood flow. These include your feet, hands, nose, and ears.

There are three degrees of cold injury: frostnip, superficial frostbite, and deep frostbite.

The affected skin may be slightly flushed. The skin changes to white or grayish yellow as the frostbite develops. Pain is sometimes felt early but subsides later. Often there is NO pain; the part being frostbitten simply feels intensely cold and numb.

In superficial frostbite, there will be an area that looks white or grayish and the surface skin will feel hard but the underlying tissue will be soft. With deeper involvement, large blisters appear on the surface, as well as in underlying tissue, and the affected area is hard, cold and insensitive. Destruction of the entire thickness of the skin will necessitate skin grafting and will constitute a medical emergency, because gangrene may result from loss of blood supply to the injured part.

Preferred method for chest compressions in neonatal resuscitations

In the most of neonatal resuscitations, if adequate ventilation is achieved, no need for chest compressions . However, in certain cases of advanced asphyxia and myocardial depression or severe pulmonary dysfunction in which adequate ventilation cannot be readily achieved, chest compressions are necessary to support the circulation during more extensive resuscitation.

Thus, the indication for chest compressions in the newly born differs significantly from that in older children and adults. The mechanics of the thoracic cage and the physical forces of the circulation of blood also differ, especially in preterm infants. The predominance of pulmonary dysfunction, necessitates a relatively lower ratio of compressions to ventilations. The 3:1 ratio of compressions to ventilations is performed with 90 compressions and 30 interposed breaths per minute (or one cycle of 4 events every 2 seconds).
The preferred method for chest compressions is the two-thumb-encircling-hands method , which provides firm support for the back and generates higher systemic arterial pressure and better coronary perfusion pressure than the two-finger method.

Corneal Abrasion:What to do and What not to do!


The patient may complain of eye pain or a foreign body sensation after being poked in the eye with a finger or twig. The patient may have abraded the cornea inserting or removing contact lenses. Removal of a corneal foreign body produces some corneal abrasion, but corneal abrasion can even occur without identifiable trauma. There is often excessive tearing and photophobia. Often the patient cannot open his eye for the exam. Abrasions are occasionally visible on sidelighting the cornea. Conjunctival inflammation can range from nothing to severe conjunctivitis with accompanying iritis.

What to do:

* Instill topical anesthetic drops (to permit exam).
* Perform a complete eye exam (visual acuity, funduscopy, anterior chamber bright light, conjunctival sacs for foreign body).
* Perform the fluorescein exam by wetting a paper strip impregnated with dry orange fluorescein dye and touching this strip into the tear pool inside the lower conjunctival sac. After the patient blinks, darken the room and examine the patient's eye under cobalt blue or ultraviolet light (the red-free light on the ophthalmoscope does not work). Areas of denuded or devitalized corneal epithelium will fluoresce green.
* If a foreign body is present, remove it and irrigate the eye.
* If iritis is present (evidenced by photophobia, an irregular pupil or meiosis, and a limbic blush in addition to conjunctival injection) consult the ophthalmologic followup physician about starting the patient on topical mydriatics and steroids (e.g., cyclopentolate or homatropine and prednisolone).
* Instill antibiotic ointment (e.g., erythromycin, tobramycin) in the lower sac. A small, superficial, non-painful abrasion may be left uncovered.
# For large, deep, and painful abrasions, patch the eye with enough pressure to keep the lid closed by folding one eyepatch double to rest against the lid, covering it with a second unfolded eyepatch, and taping both tightly with several strips of 1" tape running from the cheek to mid forehead.
# Prescribe analgesics (e.g., oxycocone, ibuprofen, naproxen), and give the first dose.
# Warn the patient the pain will return when the local anesthetic wears off.
# Make an appointment for ophthalmologic followup to reevaluate the abrasion the next day.


What not to do:

* Do not be stingy with pain medication. Patching alone will not eliminate the pain.
* Do not give patient any topical anesthetic for continued instillation.
* Do not patch a patient with a bacterial conjunctivitis or ulcer.
* Do not tape an eye patch up and down or across the nose.

Guidelines for color of bruises


1. Red to blue: about 1 to 2 days old
2. Blue to purple: about 3 to 5 days old
3. Green: about 6 to 7 days old
4. Yellow to brown: about 8 to 10 days old
5. Resolved: at least 13 to 28 days old
6. It is likely safest to describe bruises as either: "new" (red, purple, or blue) or
"old" (green, yellow, or brown)


Note: The presence of bruises that have various ages may signify multiple episodes of injury caused by ongoing physical abuse.

CPAS

Circumferential pelvic anti-shock sheeting. A. A sheet is placed under the pelvis. B. The ends are brought together anteriorly. C. Hemostats are used to secure the sheet snugly.

* A simple method for obtaining temporary pelvic stabilization when an external fixator cannot be applied is the application of a circumferential pelvic anti-shock sheet (CPAS).
* Advantages of this technique include the fact that it is inexpensive and readily available in all EDs. Special training is not required and the emergency physician can apply the sheet. Lower extremity and abdominal access is maintained after the sheet is placed.
* Caution is required in patients with lateral compression pelvic ring injuries or sacral neuroforaminal fractures. Forceful or aggressive CPAS application could worsen visceral injury or sacral nerve root injury in these instances.

Algorithm for neonatal resuscitation

Though neonatal resuscitation shares the foundation concepts of airway, breathing, and circulation with adult and pediatric resuscitation, the neonatal algorithm incorporates other concepts central to the care of the newly born infant (e.g. thermal control), emphasizes the importance of establishing adequate lung expansion and ventilation, and dictates key variations in practice resulting from anatomic and developmental differences between neonatal and older pediatric patients.
The algorithm for neonatal resuscitation begins with rapid assessment and the initial steps of resuscitation, then continues through positive-pressure ventilation (including intubation), chest compressions, medications, and special considerations.

This figure shows The algorithm for neonatal resuscitation that begins with a rapid assessment of the infant and continues through the initial steps of resuscitation, positive-pressure ventilation, chest compressions, and medications. Endotracheal intubation may be considered at several steps during resuscitation.

OMG....Extraoccular Muscle Entrapment


Extraoccular Muscle Entrapment: This patient fell, sustaining orbital floor fracture of left eye.
The inferior rectus muscle has become stuck in the fracture, preventing the patient from being able to look directly downward.
This is evident in the picture below. The diffuse scleral redness is due to traumatic subconjunctival hemorrhage.

Tear of Medial Cruciate Ligament

These are ultrasound images of the right knee joint following a motorcycle accident. There is a curvilinear echogenic structure within the medial part of the right knee joint cavity. Diagnosis: traumatic rupture of the distal insertion of the medial cruciate ligament, which now floats within the fluid distended (possible hemorrhagic) joint space.

Intradermal and Subcutaneous Injections

Academy of Health Sciences (Army), Fort Sam Houston, TX. Shows the proper method for administering a subcutaneous and intradermal injection, including selection and preparation of the site and disposal of used equipment. From the EMT video, group three series.

CPAS

Circumferential pelvic anti-shock sheeting. A. A sheet is placed under the pelvis. B. The ends are brought together anteriorly. C. Hemostats are used to secure the sheet snugly.

* A simple method for obtaining temporary pelvic stabilization when an external fixator cannot be applied is the application of a circumferential pelvic anti-shock sheet (CPAS).
* Advantages of this technique include the fact that it is inexpensive and readily available in all EDs. Special training is not required and the emergency physician can apply the sheet. Lower extremity and abdominal access is maintained after the sheet is placed.
* Caution is required in patients with lateral compression pelvic ring injuries or sacral neuroforaminal fractures. Forceful or aggressive CPAS application could worsen visceral injury or sacral nerve root injury in these instances.

Evaluation of Collateral Ligament Injury

No validated rules have been formulated for the use of radiography in patients with suspected ligament injuries, but a decision tree can be used as a guide (Figure below).
Although plain radiographs may be useful in the initial diagnosis of these injuries, magnetic resonance imaging (MRI) is becoming the preferred diagnostic method and is rapidly replacing other techniques as the study of choice for the evaluation of knee injuries. However, the routine use of MRI has been questioned because of its significant cost ($600 to $1,200) and the high accuracy of clinical examination in diagnosing some injuries.

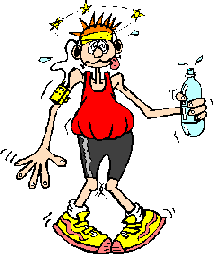
How to avoid heat-related illnesses


To keep it cool during hot-weather exercise, keep these basic precautions in mind:


* Take it slow . If you're used to exercising indoors or in cooler weather, take it easy at first. As your body adapts to the heat, gradually increase the length and intensity of your workouts. If you have a chronic medical condition or take medication, ask your doctor if you need to take additional precautions.

* Drink plenty of fluids . Your body's ability to sweat and cool down depends on adequate rehydration. Drink plenty of water while you're working out — even if you don't feel thirsty. If you're planning to exercise intensely or for longer than one hour, consider sports drinks instead. These drinks can replace the sodium, chloride and potassium you lose through sweating. Avoid drinks that contain caffeine or alcohol, which actually promote fluid loss.

* Dress appropriately . Lightweight, loosefitting clothing promotes sweat evaporation and cooling by letting more air pass over your body. Avoid dark colors, which can absorb the heat. A light-colored hat can limit your exposure to the sun.

* Avoid midday sun . Exercise in the morning or evening — when it's likely to be cooler outdoors — rather than the middle of the day. If possible, exercise in the shade or in a pool.

* Wear sunscreen . A sunburn decreases your body's ability to cool itself.

* Have a backup plan . If you're concerned about the heat or humidity, stay indoors. Work out at the gym, walk laps inside the mall or climb stairs inside an air-conditioned building.

Rabies : Post-exposure Prophylaxis


# cleanse the wound with a solution of soap and water + povidone iodine solution
# evaluate the need to institute rabies post-exposure prophylaxis - you can use the
algorithm prn

# scratches, abrasions, open wounds or mucous membranes exposed to saliva or other potentially infectious material constitute significant non-bite exposures
# simple contact (eg. petting) with a rabid animal, or its urine or feces, does not constitute a non-bite exposure
# bites of squirrels, hamsters, guinea pigs, gerbils, chipmunks, rats, mice and other small rodents, rabbits and hares almost never require post-exposure prophylaxis
# theoretically, human bites that penetrate skin could represent a significant exposure, but there have been no reported cases in the USA
# direct exposure to bats, even in the absence of a definite bite or scratch, may represent a significant exposure eg. child, intoxicated or mentally retarded adult, sleeping in the same room as a bat; household contacts of those exposed patients do not require post-exposure prophylaxis
# post-exposure prophylaxis consists of 1 dose of rabies immunoglobulin (20IU/kg) and 5 doses of rabies vaccine over 28 days (days 0, 3, 7, 14 and 28)

# a larger dose of rabies immunglobulin (40 - 50 IU/kg) is recommended for significant bites about the face and neck
# if anatomically feasible, the full dose of RIG should be given at the bite site or in a muscle as anatomically near the bite site as practical
# the rabies vaccine should be given in the deltoid muscle (not buttocks); or antero-lateral thigh in very small children
# side-effects of vaccination include mild erythema, pain and swelling at the site of injection; systemic effects such as headache, nausea, muscle aches and dizziness; and serum sickness-like reaction (arthalgia, arthritis, angiedema, generalised urticaria, nausea, vomiting, fever and malaise)
# rabies vaccination should not be discontinued because of mild reactions
# patients with a history of prior rabies vaccination only require 2x IM doses of rabies vaccine, one immediately and the second dose on day 3
# the same post-exposure rabies protocol should be used for immuno-compromised and pregnant patients
# children should receive HRIG based on body weight (20IU/kg), but should receive the same adult dose of rabies vaccine

Popular Posts